Thursday, June 2, 2011

Graduation/Marine Cake

So my little cousin's boyfriend's mom asked me to make a cake for her son's graduation/going into the Marines. She wanted a full sheet cake where half the cake was decorated in his high school colors and the other side done in Marine colors.  We decided to make half the cake white cake with buttercream and the other half chocolate with chocolate icing.  I decided to order edible logos for the high school logo and the Marines logo, but ended up not getting the logo for the high school and had to end up using the piping gel/wax paper trick.  


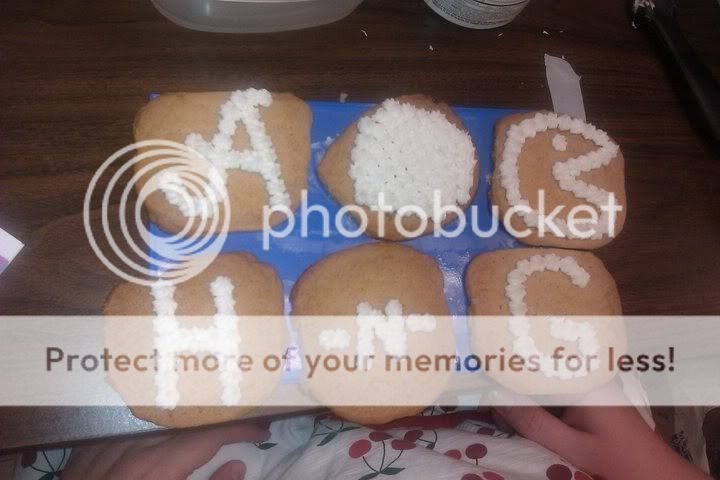
If you've never used piping gel you take an image and invert it and place it under a piece of wax paper.  Then you take some piping gel (located in the cake decorating section at most craft stores or Wal-Mart) and you can use any color food coloring and mix it into the piping gel.  Then you use a small circle tip (tip 1 or tip 3) to trace around the the picture under the wax paper.  Once you have finished tracing just take the wax paper and place it on your iced cake then fill it in. 


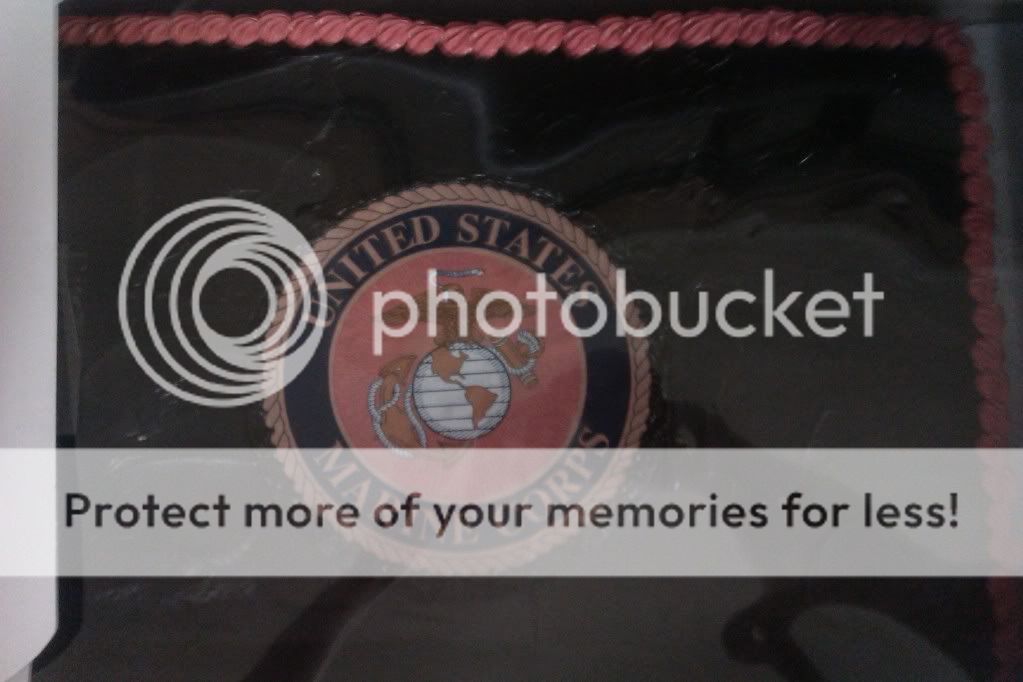
The edible logo was easy to apply.  It came on wax paper and I just had to roll it across the edge of the table to loosen the logo from the wax paper.  Once it was loosened then just you pull it off, place it on the already iced cake and then press the logo down gentle working from the center outwards.  Once I had the logo on I just used some black icing (chocolate icing colored black) to cover us the white edges of the logo. 


For the white cake I used buttercream icing and colored it blue and orange.  I used the blue for the majority of the background and used the orange as the boarder and for the V in the logo. 


For the chocolate cake I used chocolate icing and buttercream icing.  The chocolate was colored black and the buttercream was colored red.  

So here is what the cake looks like after its all said and down.  I placed the white cake on the left and the chocolate on the right. They are pushed together so you can't see the whole cake because of part of it being under the cake box. (Sorry about the picture quality.  It was kind of dark in my mom's kitchen.)


Hope he likes it. :)


Friday, February 4, 2011

Hello Kitty/Mushroom Cake

So my niece, Grace's birthday is in December, but since she is with her mom at that time we normally have her birthday party sometime in January. This year we had to push it back to the first week in February due to some scheduling conflicts. Anywho!  For her birthday cake this year she told me that she needed a Hello Kitty/Mushroom cake. You might be wondering how do Hello Kitty and Mushrooms go together...I will tell you. Apparently in the mind of a 6 year old Hello Kitty is pretty cool. (I totally agree with this!) But apparently so are the mushrooms from Super Mario Brothers. So, in her mind she has come up with the idea of putting these two things together into one cake. 

So after thinking on this long and hard I finally came up with an idea. She saw these things of candy at World Market that are sweet/sour pieces of candy and what do you know....they come in two styles of holders...Hello Kitty & Mushrooms from Super Mario Bros. So I decided that I would make a checkerboard cake (inside and out) and have Hello Kitty and the Mushrooms facing off against each other. My original idea was to go and buy the candy holders and put them on the cake, but after finding out how much they are just for one I decided that wasn't such a good idea. 

I started the cake tonight and to get the checkerboard effect on the inside of the cake I made two types of cake, Chocolate and White. Once you have them both cooled you take a knife (tried to find a cookie cutter, but they apparently don't make them as big as I needed) and a ruler and go to town. You cut a smaller square or circle depending on what type of cake you are doing out of the inside of both cakes and swap the layers. Then in the layer you just swapped you make a smaller square/circle and swap. Keep going until you have reached the middle of the cake. I made my layers about 1 inch in width.
Once you have both cakes done you ice the inside and stack the cakes. Now when you cut into the cake it should look like a checkerboard on the inside.


To ice the cake I decided to use pink and green. I did a pink and green checkerboard on the top of the cake and then alternated the colors on the side of the cake between pink and green. After the cake was iced I decided to make Hello Kitty and Mushroom cake pops. For instructions on how to make cake balls/pops you can see the link below. Bakerella Cake Balls

Below is a picture of the final product.

Hot Pink Cake!

This cake was for my cousin Erin's 13th birthday. She is a princess and was having a costume party for her birthday this year. The 13th party is the last party they get to have before their 16th, so she wanted to make sure he cake was awesome. I pretty much had free reign over this cake. She wanted it to be a total surprise. She did give me input on her favorite colors though. Her favorite colors are all BRIGHT! Hot Pink, Lime Green, Electric Blue, Electric Purple. 

So my idea for the cake was to make her a princess cake since she was going to dress as a princess for her costume party. I planned on HOT PINK on the outside with PURPLE cake on the inside and for the filling to do a rainbow with all the colors she gave me. 

For the cake I used white cake and added electric purple food coloring to it. When we cut into it it kind of looked like Barney got baked inside my cake. :) For some reason I cannot find the picture I took of the inside, but as soon as I do I will post it.

The outside got the hot pink treatment. I added different colored dots on the bottom of the cake and her initials on the top. For the finishing touches I added a glass slipper on top, some diamonds around the cake and some pretty jewels dangling from the cake. The jewels didn't turn out so well. I apparently used the wrong kind of wire when I made them, but now I know and knowing is half the battle. :)

Finished product

Top view

Tuesday, October 19, 2010

Change of Design

Found out the reason the square cake didn't come out even was because the pan was actually bent causing all of the cake to pool in the middle.  I went back to Hobby Lobby to see about getting another pan, but all of them were like that.  So....on to plan B.  

We've decided to change it to a round cake about 2 weeks before the wedding.  Well, I started coming up with the plan of when everything was going to get made and put together and it ended up that one of my co-workers got sick and had to go into the hospital.  We had made plans to swap shifts the week of the wedding so I could be off to make the cake.  Because she is an awesome lady and she is always taking care of everyone else I covered her shift until they made other plans to make sure it was covered. 

The week of the wedding Kathy and I changed our mind again since I wasn't sure how much time I was going to get off to bake the cake. We decided to go with 3 types of cupcakes (Strawberry, white and chocolate) with an 8 in. round cake for them to save for their 1 year anniversary. 

To save time we used box cake mix for the cupcakes.  For the 8 in. round I did half chocolate and half white.  We decided to use my mom's Chocolate Cake recipe and the cake part from a Baltimore Cake recipe.  Because of the time crunch we used store bought Buttercream icing and just used the Wilton's White-White to get it to the color we needed.

Once we had everything baked and cooled we started piping the icing on. I decided to go with a star tip for a rose look on the cupcakes since Kathy thought it looked pretty.  Once we got all of the cupcakes iced I took a small round tip and piped different things onto the cupcakes in pale pink.  


On this one it had the date of the wedding.


On this one I did the initial of their last name. You can also see on the one to the left that I put a Gerber Daisy on the cupcake.


This one has both their initials on the side and the last name initial in the middle. (This cupcake didn't have a good trip on the way to the wedding. It got a little squished on the side of the box.)

For the round cake we decided to keep with the same idea that we had come up with for the square cake. We iced it in the ivory buttercream and added the pale pink dots around the cake with the ribbon on the bottom.  Kathy decided on a "L" with rhinestones for the cake topper so I put it on the top with a Gerber Daisy and a light pink rose. To finish the cake I did a small shell piping around the top of the cake.


We placed the cake and the decorated cupcakes on a tiered stand in the center of the table and had two smaller cupcake trees on the sides with the plainly decorated cupcakes.


We decorated the tiered stand with a couple of the Gerber daisies and light pink roses.

Here is a picture of the happy couple standing behind their cake/cupcakes.


Friday, September 10, 2010

Practice Cake - Take 1

As I said in my last post Kathy and I were taking cake decorating classes and that I would keep you posted on the happenings of that class. Well we ended up not going to our last class. I ended up going to a football game for my little cousin's first time marching in the band. My teacher called me the week after the class and told me to go ahead and decorate my cake and send her a picture though so I could get my certification for taking the class. Soooo....I decided that decorating a cake and doing a practice wedding cake for my brother, Bryan and Kathy's upcoming wedding at the same time would be a GREAT idea.

First I had to talk to Kathy about what type of cake they wanted. Since she was married before and had a round cake then she wanted a square cake this time. We came up with making the cake ivory colored with baby pink dots on the side and brown and pink ribbon around the bottom with pink flowers on the corners of the cake. She really wanted chocolate cake with buttercream and my brother wanted white cake with buttercream, so I decided I would make half chocolate and half white cake.

This was my first attmpt with using square cake pans and I have to say that it was a little harder than I would have thought. My cake rose really high in the middle so I ended up having to cut a good bit off to level it and it still wasn't very level.

I used boxed cake mix for both the chocolate and the white cake, but I actually made my own buttercream. I used the Wilton buttercream recipe, but I didn't use the shorting cause I think it tastes funny. I like my buttercream with nothing but butter in it, but using only butter does have its down falls. When you use only butter it makes the icing butter yellow, so I bought some Wilton White-White and lightened the icing to the color I wanted it.

Here is what my first attempted turned out like. The flowers are just some fake ones that Kathy brought bake from Hawaii for my nieces. For the real cake she is wanting to use Gerber daisies or something like that.

Sunday, August 22, 2010

Cake Decorating Class

My sister-in-law, Kathy and I decided that we were going to take some cake decorating classes. The first week in class we learned the basics of making icing and baking a cake. We also learned how to use the star tip and deocrated cookies using the star tip.


Our second week in class we had to bake a 8 in. round to bring to class so we could learn to ice it correctly and do gel transfers. We also learned how to make a ribbon rose, pipe dots and do curvey lines.


We didn't have a lot of time to deocrate the cake after we did the gel transfer (which you can see a little of my purple gel if you look at the top of the cupcake) because it took so long for the cakes to harden after we iced them. Also, my wax paper stuck to my icing (which it isn't supposed to do by the way) so my icing is a little lumpy.

Our third week in class we learned how to do drop flowers, shaggy mums, leaves, and puff flowers


Here is my puff flower. My icing wasn't quite stiff enough to stand up like it was supposed to, but overall I think it was pretty good.


Here are my shaggy mums and leaves on top of my cupcakes. I thought they turned out pretty well and they were fun to do.

Next week is our final week of class and we are supposed to fully decorate a cake. I'll keep you posted on how that goes.

Transfromers

My friend Rachael decided that she wanted to make a cake for her son's birthday party and I told her that I would help her with the cake. We decided on making 2 - 12 in. chocolate cakes and 2 - 8 in. white cakes. Racheal found some recipes online for chocolate cream cheese icing and some kind of raspberry icing (I'll have to find out exactly what it was from her.)

Well, the cake making went okay. We got the white cakes made without any problems and 1 of the chocolate cakes made without any problems. The second chocolate cake that I made got stuck in the pan and ended up falling apart when I got it out of the pan. The second attempt went much better. When we started putting the cake together we quickly realized that the chocolate cream cheese icing was not meant to be a filling. Within 20 minutes after putting the second layer on top of the chocolate cream cheese icing the cake started splitting in half and eventually fell right off, so we ended up taking the top layer off, cutting the bottom layer in half and flipping the top part with the icing on it around so it made 2 smaller layers. I did the same for the white cake so it wouldn't be disproportionate.

We decided to try to make the All Spark from the move as a topper for the cake. We made some marshmellow treats and shaped it into a square. We then we had our first run in with fondant and lets just say...it didn't go so well. After I covered the marshmellow treats with fondant I took a skewer and made the marks from the All Spark. I then took glitter dust and brushed it on to the whole thing then took black petal dust and brushed it into grooves to make them stand out.

I wasn't completely happy with the results, but her kid liked it so that's all that matters.